
Outlined process for adding a suppression list to a HubSpot workflow. This ensures that certain contacts are automatically excluded from workflow actions when they meet specific criteria.
Context
Adding a suppression list to a workflow helps prevent contacts who meet specific conditions (e.g., unsubscribed, canceled meetings) from receiving automated communications or being enrolled in workflows. This helps maintain data integrity and adheres to compliance standards.
Terminologies
- Workflow: A series of automated actions in HubSpot based on set criteria.
- Suppression List: A contact list used to exclude specific individuals from workflows.
Tools
Add any relevant tools associated with this process.
- Hubspot - Used for creating and managing properties.
Roles & responsibilities
Define who will be executing the activities related to the SOP.
- Team Member: Responsible for editing workflows and applying suppression lists.
- Approver: Reviews workflows and ensures compliance with suppression criteria.
Procedure
Step 1:
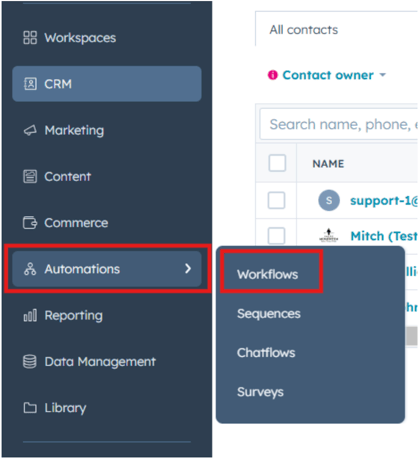
Navigate to Automation in HubSpot and select Workflows.
Step 2:
Search for and select the workflow to which you want to add the suppression list.
Step 3:
Click Edit to enter the workflow's by opening it.
Step 4:
Locate and select Goal or Enrollment Triggers by clicking Edit -> Goal.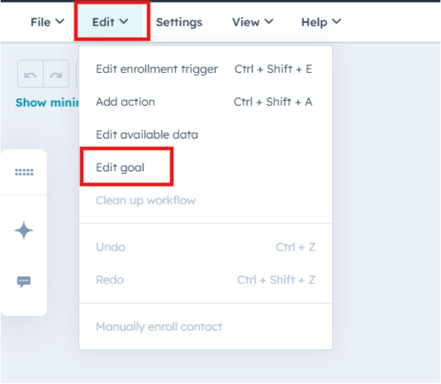
Step 5:
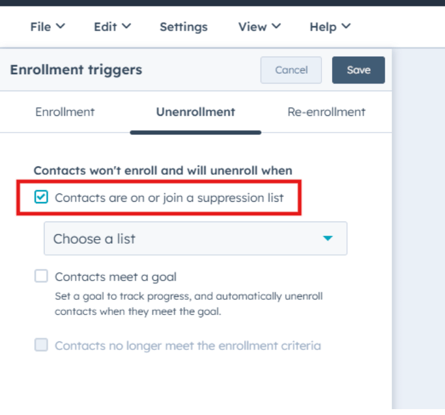
Check the option Contacts are on or join a suppression list to include this condition in the workflow.
Step 6:
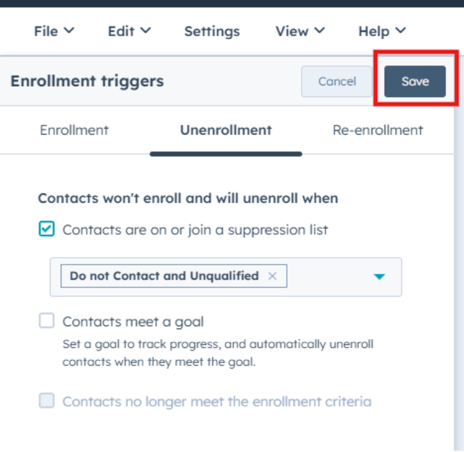
Search for and select the appropriate Suppression List from the available lists.

Step 7:
Click Save to confirm and apply the changes to the workflow.
Notes
- Suppression lists can be used to exclude contacts who opt out, cancel meetings, or meet other specific criteria.
- Regularly review workflows and suppression lists to ensure they align with the current marketing and data management strategies.